In this tutorial, I walk you through how to style and add a Flodesk embed form to your Showit website. It’s no secret that email marketing can be a game-changer for your business. Social media algorithms can be, shall we say, unreliable 😅. But by growing your email list, you have more control over how and when you communicate to a group of people who have already taken one step closer to working with you (they gave you their email after all).
You can leverage the power of welcome and nurture sequences that run on autopilot. That means you can provide extraordinary value and build trust among prospective clients while you sleep, tend to your kids, or take care of the other hundred things that small business owners need to manage. But in order to do that, you first need to embed a lead capture form on your website or landing page.
Ways to grow your email list
There are many different ways to start connecting with your audience and growing your email list. Depending on your business goals, you may look to incorporate a variety of these commonly used approaches:
- General Newsletter – Keep your audience regularly updated on new releases and special deals.
- Lead Magnet – Give your audience a quick win with a free workbook, mini course, swipe files cheat sheet or checklist…just to name a few ideas.
- Waitlist – Start a waitlist to build up hype around the launch of a new product, service or website.
- Giveaway – Invite your audience to submit to your giveaway.
- Special Discount – Offer an insiders only discount or early bird discounts for special sales and new launches that are only available to the VIPs on your email list.
Choose your email marketing tool
Choose an email marketing provider to get started. A few of the most popular tools to look into are Flodesk, MailChimp, ActiveCampaign and ConvertKit. I started with MailChimp years ago and still use it occasionally for a separate business. The free plan is enticing when you’re just getting started. However, I find the overall user experience a bit clunky and at times overwhelming.
The simplicity and elegance of Flodesk convinced me to switch when launching this design business, and that’s the platform I’ll be using in this tutorial. Flodesk is a women-led email marketing tool that offers unlimited emails, subscribers, landing pages and more with their subscription, so you aren’t penalized for growing your email list.
If you don’t have an email marketing platform yet, you can get 50% off your first year of Flodesk with my affiliate link here.
Setting up a Flodesk Embed Form
Log in to your Flodesk account and follow these steps to start building your first email marketing campaign. At the top center, you should see a few different “tabs”. The two we will be using today in this tutorial are the Audience and Form tabs. Below there is a video tutorial that will walk you through this process step by step.
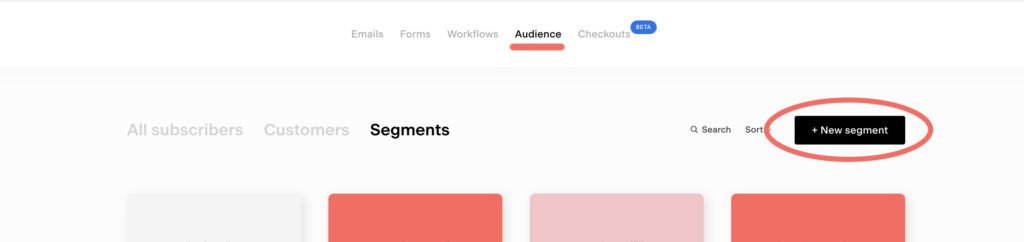
Step 1: Set up your Segments
Click on the “Audience” tab and go to Segments. A segment is basically how you will categorize your leads. For example, you may want to create one segment for a specific lead magnet or opt-in and another one for your general newsletter. Perhaps later on you will create a third segment for the waitlist of a new launch. When you are setting up workflows and sending emails, segments will help you keep your subscribers organized so you send the right content to the right people.
Step 2: Create your Flodesk Form
Click on the “Forms” tab top center. Here you can see your existing forms (to edit, duplicate, etc.) or you can click on the + New Form button on the right. This will take you to a new page to select a form to start with. There are three types of forms to choose from:
- Popup – A popup form appears over the other content on your website and appears by different triggers (after the visitor is on your page for so many seconds, scrolls past a certain point, etc.). This only requires one snippet of code to be added to your website page.
- Inline – An inline form is embedded inside a canvas or page on your website. This is the form that I am using in the tutorial video and requires two snippets of code added to your website.
- Full Page – This type of form can serve as a landing page with its own URL.
In the tutorial video, I’m using the Inline Form, but you can check out this Flodesk tutorial to learn more about the differences of each type of form. When you select a form to customize, Flodesk will prompt you to Choose a Segment. Select the Segment that corresponds to this form. You also have the option to create a new segment for the form if you haven’t done so already.

Step 3: Customize your Flodesk Embed Form
Now that you’ve selected a form, you have the option to customize it to match your brand. This includes changing the fonts, colors and button style, as well as choosing which input fields you will require for your form. At a minimum, require an email address (that’s the whole point right?), but you can also include an additional field or two to can create a more custom experience for the one signing up. For example, requiring a first name will allow you to address them by name in future email communication, which just feels more personal. Don’t forget to customize a confirmation message as well!
The video below will walk you through how to customize your form in a variety of ways. For the example, I am using one of my Showit website templates (Alice and Vine) but you can change the settings to match your brand aesthetic.
Add the Flodesk Embed Form to your Showit Website
When you finish customizing your form, you’ll come to the final section that says “Publish your form”. Here you will see two separate pieces of code. Don’t be alarmed – it’s easier than it looks I promise! The following steps outline exactly where you need to place each code in order to add your Flodesk embed form to your site.
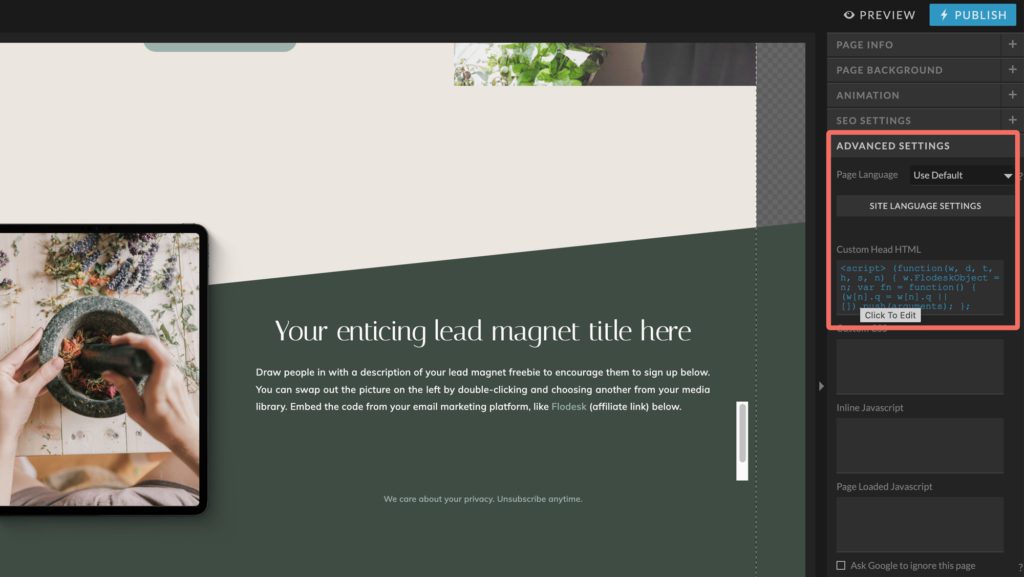
Header Code
The first piece of code is the Header Code. Copy and paste this into Showit on every page where your form will appear. Click on the page name and go to the Advanced Settings tab on the right. Click in the “Custom Head HTML” box and paste this code there.
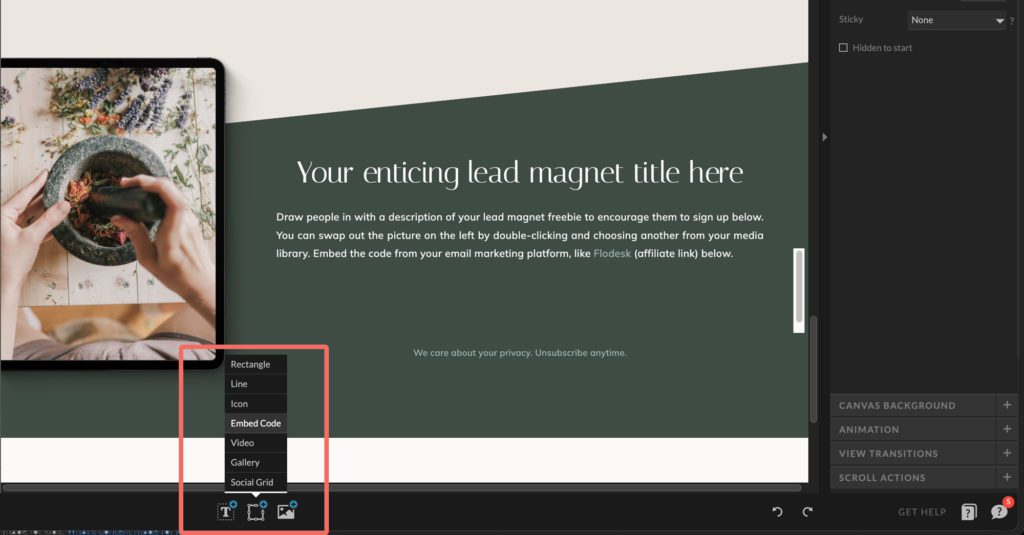
Inline Code
The inline code goes directly into the individual page canvas where your form should be displayed. Click into the canvas where you want to add your form and choose the middle icon on the bottom to add an Embed Code (see photo below). You can move and resize this box accordingly. Double-click into the gray box and another dialogue box will appear. Paste the inline code there.
Once you’ve added the code, be sure to check the preview on both mobile and desktop to ensure that your Flodesk embed form looks good and is accessible to the viewer. You may have to adjust or resize the box for the embed code accordingly.
Set up your Emails and Workflow
Once you have the form embedded on your Showit website, then it’s time to go back to Flodesk (use my affiliate link for 50% off your first year) and set up your email workflow. Now this is a tutorial for another day, but to get you started, click on the Flodesk submark in the left corner and go back to the main dashboard:
- Click on the tab “Workflows” and choose + New Workflow
- Select one of the templates to customize or start from scratch
- Give your workflow a name and start customizing
- Set your trigger: A subscriber is added to… select your segment
- Start customizing your first email that will go out immediately to new subscribers
In this first email, you’ll want to be sure that you deliver on your promise. Was your sign up form for a PDF freebie? Then make sure you include the download link or means to access that in this first email. Inside your workflow is where you can build out a whole nurture sequence and add time delays between your emails as needed for your email marketing campaign.
Bonus Tips!
Congrats! Hopefully you have found this tutorial helpful and have successfully added your new Flodesk embed form to your Showit site. Let me conclude with a few additional tips.
Tip #1: Convert to a Site Canvas
Convert this canvas to a Site Canvas if you plan to use it on multiple pages throughout your website. This means you can more easily add this canvas to any page without having to rebuild it. In case you need to make changes, you only have to make the changes once and this will automatically update everywhere you are using this canvas. Just remember to add the Header Code to those pages too! For simple instructions on how to turn a canvas in a Site Canva, see this tutorial from Showit.
Tip #2: Test it out first!
Test before you promote! It’s always good practice to sign up for your own newsletter or opt-in and experience the process as a prospective client would. Better yet, ask a close friend or family member to sign up too (preferably one that is very detail-oriented 😎). Check for broken links, typos and the overall flow of your email layout and lead magnet delivery.
Tip #3: Ask for help
If the whole process starts taking up too much of your valuable time, don’t be afraid to ask for professional help. I get it – setting up a complete email marketing campaign takes a lot of time and energy. Hand the overwhelm over to me! I offer VIP Design Days that are a perfect fit for a project like this. We can set up your Flodesk, add your embed form, build out a multiple email workflow, and even design your lead magnet!