When starting a website or getting ready for a VIP Design Day to make some updates, knowing how to optimize website images properly can seem rather unimportant. Focusing on the bigger things like strategy, design, and copy are a lot more fun, right?
Nevertheless, as with so many other unsung heros in the tech world, optimizing your website images from the start will pay dividends down the road. Here’s a quick overview of what we’ll cover in this post:
- Website images best practices and why they are important
- How to compress website images quickly + tutorial video
- Additional resources for updating your website
Website Images Best Practices
1. Know what size website images should be
Essentially, you want your website images to be as small as possible without losing quality. This can significantly reduce your site’s load time, which in turn can improve conversions and bounce rates. It’s important to find the balance between file size, dimensions, and resolution. Let’s break it down.
Resolution: The traditionally-accepted website image resolution is 72 dpi, though I personally prefer to bump it up to 96 dpi.
Dimensions: For larger photos that will be used as background photos or extend the width of the screen, I size to 3500px wide in keeping with Showit’s recommendations. This ensures they don’t lose their quality or appear blurry on larger screens. You can resize smaller photos to 700 – 800 pixels wide, though I often size mine to 1000 pixels as long as the file size doesn’t get too big.
File Size: 300kb or less for the majority of your website images is ideal. Larger, full-width images will probably exceed this, though I still try to keep these under 1 mb.
2. Choose an optimal file format
When it comes to photographs, JPG is the optimal file format for website images. PNG and GIF formats are also used, but only recommended when transparency (PNG) or animation (GIF) are necessary.
For logo files and other brand elements, I strongly recommend using a SVG format. It looks extra sharp and usually has a very low file size.
3. Boost SEO with a Relevant Image Name
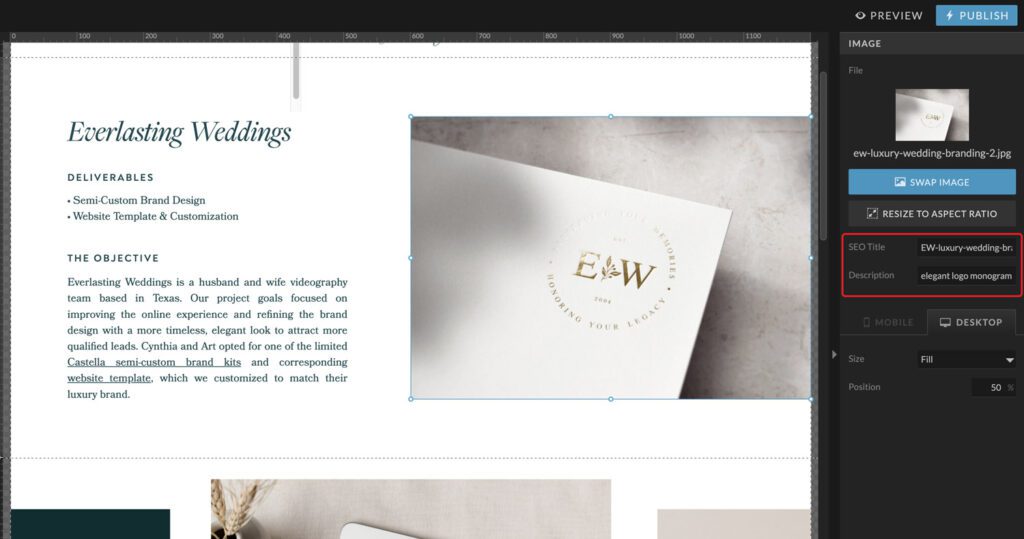
Giving your photos a relevant name before uploading is an often overlooked way to optimize your website images. It’s only one piece of the puzzle, but this step can positively impact your SEO. For example, instead of the usual image file name like “IMG-1289.jpg”, try including a keyword, your business name, or something that describes what the photo is showing, such as “ali-james-texas-wedding-1.jpg” or “website-design-for-photographer-23.jpg.”
4. Use Alt Tags and Descriptions
Image Alt Tags should describe what the photo is showing. Bonus points when they contain one of your SEO keywords! Not only will adding alt tags to your photos boost your SEO, but it will also make your website more accessible to visually-impaired users who are using screen-reading software to explore your site.
How do you add alt tags to your images? Do this after your images have been uploaded to your website. If your website is designed on Showit, this is the same as the SEO description, which you find under the “Image” tab when you select your photo. See the image below and this short article for more details on optimizing your images for SEO on Showit.
5. Be selective and source quality photos
One way to simplify the whole process of optimizing your website images – be more selective! This is especially true if you are a photographer, designer or other creative who uses their website to display their portfolio. I know, it can be tempting to showcase every single photo from that gallery, but in reality we know that life is busy and website browsers are in a hurry! It’s ok to curate your portfolio and trim down galleries to show only your very best work. This will automatically reduce the time it takes to optimize your images, as well as your website’s load time.
If you’re not a photographer, you will want to source high quality photos to display on your site. When possible, I recommend hiring a brand photographer to take unique, on-brand photos. This will help set you apart in your industry. This can be supplemented with quality stock photos, free or paid. A few of my favorite sites to source free commercial stock photos (and videos!) are Unsplash and Pexels.
How to compress website images quickly
Optimizing your website images can be a tedious process, especially when it comes to compressing them for web use. Thankfully, there are several tools available to make this process easier and save you time! A simple Google search for image compression tools will give you plenty of free options to use. However, I prefer using Adobe Photoshop or Lightroom for this because it allows me to adjust the file names in bulk as well. Below I’ve put together a short tutorial video that walks you through how I compress website images quickly using Adobe Lightroom.
A note for Showit users: While the Showit platform does resize images automatically without the need for compression tools (hooray!), you will need to resize images you upload to your WordPress blog.
Summary & Additional Resources
As small business owners, we need to take every opportunity we can to boost our visibility and improve our website. Taking the time to optimize your website images is an important part of that upkeep. Below are a few additional resources you may find helpful when uploading images or other media to your website:
- Veed – A great online tool that I use frequently to compress videos for web use, among the many of capabilities they offer.
- Pingdom – Use this tool to test your website speed and get tips on how to improve it’s speed
- 5-Day Website Revamp Challenge – Putting off updates to your site? The 5-Day Website Revamp Challenge is the accountability partner you’ve been missing. Get simple, actionable steps sent straight to your inbox PLUS free Showit canvas designs to streamline your website updates!